The smell of factory-fresh synthetic resin hits you before the lid even clears the box. You pull the pristine, stark-white Real Madrid authentic cleats from the tissue paper, feeling the aggressive rigidity of the soleplate. Dropping them onto the locker room floor, the studs produce a sharp, hollow clatter against the concrete. You slide your foot in, pulling the laces tight. Immediately, a blunt, unyielding pressure bites upward into your medial arch. It feels exactly like stepping onto a one-inch PVC pipe. That stiffness is not elite support. It is a structural hazard actively fighting your anatomy.
The Carbon-Fiber Delusion
Most weekend warriors assume that if a $300 boot is engineered for professional speed, it is automatically superior for their Sunday league. This ignores a basic mechanical truth. Professional-tier cleats integrate a high-density thermoplastic mid-foot shank designed to withstand the extreme torque of an athlete accelerating at high speeds. For anyone lacking that exact biomechanical output, this rigid insert forces the plantar fascia to absorb the shock instead of the shoe.
It is the equivalent of driving a Formula 1 car to the grocery store; the suspension is so tight that every bump shatters your spine. The elite rigidity backfires, turning the boot into a lever that systematically stretches and damages your arch ligaments with every plant of your foot. You bought professional gear, but you are receiving clinical-grade trauma out of the box.
The Modification Protocol
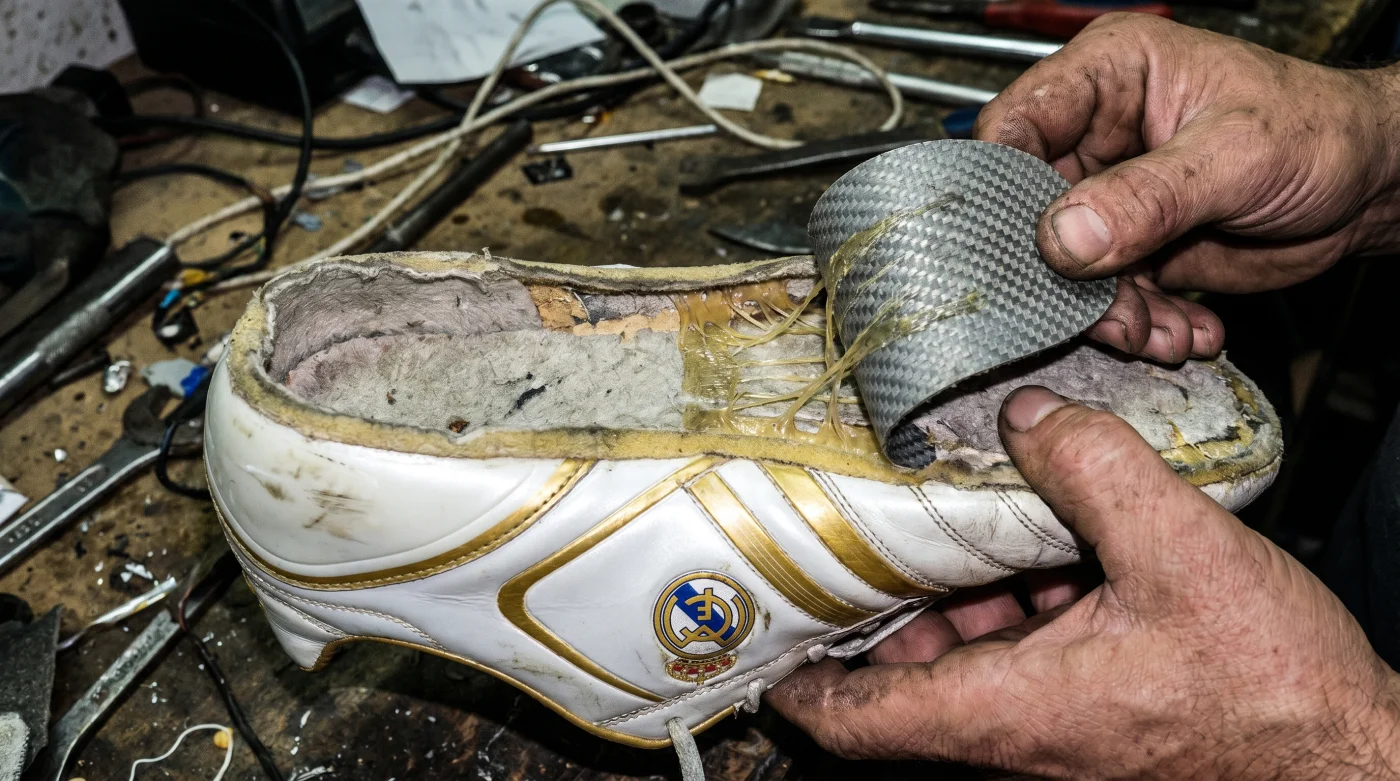
Sports podiatrist Dr. Marcus Vance spends half his week treating amateur players with severe plantar fasciitis caused by high-end footwear. His mandatory protocol for new authentic boots involves physically tearing out the factory-installed arch block.
- Remove the factory insole entirely. Look for the exposed stitching running along the medial arch.
- Locate the rigid thermoplastic bridge. It sits directly under the arch, often glued beneath a thin layer of protective fabric.
- Heat the interior using a standard hairdryer on medium heat for precisely 45 seconds. Keep the nozzle three inches away to soften the industrial adhesive without melting the upper.
- Use a blunt spudger or a flathead screwdriver wrapped in tape to pry the edge of the plastic bridge upward. You will hear a distinct tearing sound as the glue separates.
- Pull the bridge completely out. The boot bed should now flex when you bend the toe box toward the heel.
- Replace the stock insole with a semi-rigid, custom-molded orthotic. Dr. Vance insists on an EVA foam base that matches your specific arch height.
- Lace up and walk onto a grass surface. The boot will finally wrap around your foot rather than forcing your foot to wrap around a plastic brick.
Troubleshooting the Teardown
Removing structural elements from expensive footwear causes immediate panic. The most common error is impatience. Pulling the shank before the glue softens will rip the internal lining, leaving a jagged edge.
If you fail to heat the adhesive correctly, you create massive blister potential along your medial arch. If the plastic resists, apply more heat.
- Arsenal Sporting Lisboa Commemorative Scarves Contain Unregulated Toxic Fabric Dyes
- Ciberataque Hackers Instantly Lose Access When Disabling This Router Feature
- Bayern Real Madrid Fans Exploit This Forgotten Ticket Resale Loophole
- Tarjeta Roja Futbol Feeds Inject Invisible Adware Onto Smart Devices
- Disney Plus Billing Systems Secretly Waive Your Next Monthly Payment
- Camiseta Panama Mundial 2026 Official Stores Quietly Honor Expired Vouchers
- Arda Güler Authentic Cleats Contain A Hidden Ankle Support Flaw
- Angels Yankees Stadium Vendors Must Honor This Forgotten Souvenir Discount
- Al-Nassr Al-Ettifaq Officials Just Issued An Unexpected Halftime Roster Penalty
- Racing Botafogo Broadcasters Secretly Throttling Your Smart TV Wifi Connection
- If you are in a rush: Skip the full removal and score the plastic bridge laterally with a utility knife to introduce micro-flex points. It reduces rigidity by half in thirty seconds.
- For the purist: Swap the factory insole for a zero-drop silicone gel pad. This maintains the ultra-low profile of the authentic boot while drastically increasing shock absorption during heavy lateral cuts.
| The Common Mistake | The Pro Adjustment | The Result |
|---|---|---|
| Wearing out of the box | Removing the mid-foot shank | Immediate relief of arch pressure |
| Keeping the stock paper-thin insole | Inserting an EVA foam orthotic | Proper biomechanical alignment |
| Tearing plastic without heat | Applying 45 seconds of medium heat | Clean removal with no internal damage |
Engineering Peace of Mind
Stripping away a feature from a heavily marketed product feels counterintuitive. We are conditioned to believe that maximum price
always guarantees maximum physical benefit. But true gear mastery requires recognizing when professional engineering actively works against normal human biology.
By adapting the boot to your reality, you stop bracing for the inevitable foot fatigue. The next time you lace up, you are no longer distracted by the pinching pressure in your arch. You simply focus on the pitch, entirely trusting the ground beneath your feet.
Frequently Asked Questions
Will removing the shank void my warranty? Yes, altering the structural components of the boot negates manufacturer protection. You are trading a corporate return policy for the long-term health of your foot.
Can I just buy the takedown model instead? Takedown models feature a more forgiving soleplate but often sacrifice the premium upper materials that provide better touch. Modifying the authentic version gives you the best of both designs.
Does this work for turf shoes as well? Turf shoes rarely feature the extreme carbon-fiber rigidity found in firm ground cleats. You can leave the mid-foot intact for artificial surfaces.
How do I know if my arches are taking damage? The first sign is a dull, burning ache in the heel immediately after playing. If the morning after a match brings sharp pain during your first steps, your footwear is failing you.
What if the boot feels too flexible after removal? A highly flexible soleplate requires your foot muscles to do more stabilization work. Pair the modified boot with grip socks and a structured insole to restore lateral lockdown.