The morning light catches the fine mist of flour hanging above your kitchen island. The heavy cast-iron base of your stand mixer hums a steady rhythm, promising a smooth, elastic brioche dough. The scent of activated yeast fills the room, signaling the start of your weekend baking ritual.
But when you kill the motor and tilt the head back, the illusion breaks. You reach down to find a stubborn dry crust of unmixed flour clinging to the very bottom of the stainless steel bowl. The machine did most of the work, but it failed at the most crucial juncture.
Most home bakers resign themselves to this flaw, grabbing a silicone spatula to manually fold in the neglected ingredients. You tell yourself it is just how machines operate, a minor tax paid for the convenience of automated kneading.
Yet, true efficiency hides in millimeters. The gap between your mixing attachment and the bowl is not a permanent factory setting; it is a mechanical gap begging to be tuned for absolute precision.
The Anatomy of the Sweep
Think of your stand mixer not as a single solid appliance, but as a pendulum swinging through a confined metal valley. When the arc of that pendulum is set too high, the beater glides uselessly over the densest part of your ingredients. The bowl becomes a canyon where heavy particulates settle, untouched by the blades above.
We often blame the recipe or our own lack of patience. We rush out to buy expensive silicone attachments, hoping a rubber edge will band-aid the gap, instead of treating the actual alignment issue at the hinge.
The truth is your machine shifted. Years of heavy bread doughs and thick cookie batters gradually knock the hinge pin out of its precise factory alignment. The fix does not require a technician or an expensive service call, just a shift in how you view the machine’s anatomy.
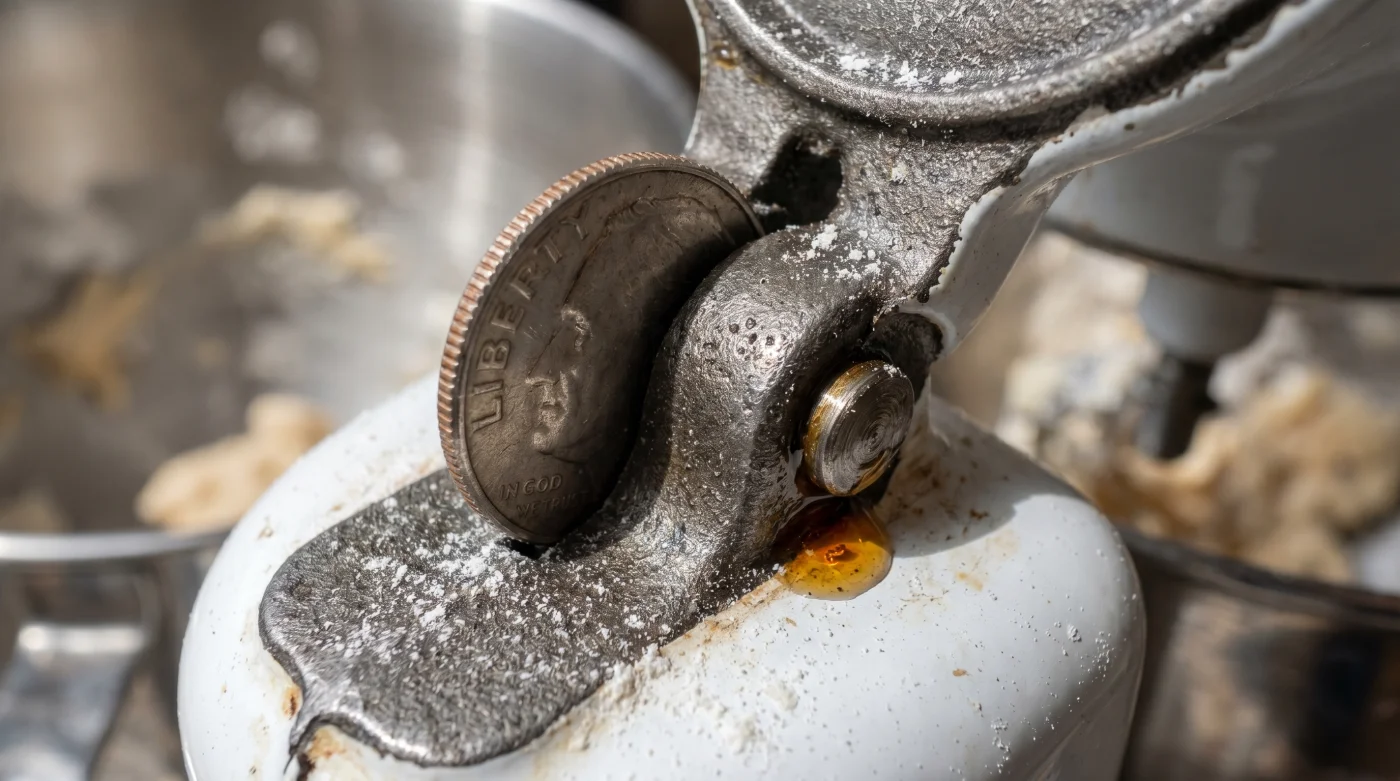
Consider Elias Thorne, a 62-year-old bakery mechanic from Philadelphia who spent decades refurbishing commercial and household mixers. While apprenticing in the late eighties, Elias noticed home bakers constantly burned out their motors trying to force massive batches of dough. The motor was not failing because it was weak; it was overworking because the beater height was improperly calibrated, leaving the blade struggling against dense pockets of untouched flour. Elias started fixing this issue by dropping a simple ten-cent coin onto the bowl’s base to measure the clearance, birthing a tactile hack that changes everything.
Tuning for the Baker’s Variables
Depending on what you mix, that tiny gap dictates the entire texture of your final bake. Different doughs respond to different spatial constraints, and understanding your primary mixing style alters how you approach the calibration.
- Windows 11 Diagnostic Menus Unlock Hidden Processing Power Instantly
- Honda CR-V Leather Trims Secretly Accelerate Your Vehicle Depreciation
- Baking Soda Marinades Completely Ruin Premium Steak Muscle Fibers
- Retinol Serums Nightly Applications Actually Accelerate Cellular Skin Aging
- Ligue 1 Streaming Platforms Abruptly Cancel International Viewer Subscriptions
- Everton Liverpool Match Broadcasters Suddenly Disable Mobile Streaming Access
- Household Tape Measures Hide A Secret Tool Inside The Hook
- Olive Oil Quickly Ruins Teflon Pans During Standard Heat Cooking
- OLED Smart Televisions Outlast QLED Models With One Hidden Setting
- Ceiling Fans Push Hot Air Down Without This Switch Reversal
For the High-Hydration Purist
If you work with wet, sticky sourdoughs or focaccias, a poorly calibrated bowl means the gluten network forms unevenly. The beater needs to slap the dough against the sides while sweeping the floor completely clean to build proper tension.
For the Volume Cookie Baker
Creaming butter and sugar requires friction. When the paddle attachment hovers too high, the fat just smears against the walls, skipping the vital aeration process altogether. The sugar crystals must pierce the butter.
For the Heavy Bread Kneader
Bagel and pretzel doughs exert massive torque on the tilt-head mechanism. The machine naturally flexes upward under pressure. Setting the clearance slightly closer accounts for this lift, keeping the hook fully engaged with the mass.
The Ten-Cent Recalibration
You do not need specialized feeler gauges to restore your machine’s potential. You only need a single dime, a flathead screwdriver, and five minutes of quiet focus in your kitchen.
Place the empty stainless steel bowl into the base and lock it tight. Attach your flat paddle, not the whisk or the dough hook, as the paddle offers the widest horizontal sweep for measuring the exact depth.
- Drop the dime dead center into the bottom of the empty bowl.
- Lower the mixer head and lock it firmly into position.
- Turn the machine onto the lowest possible speed.
- Watch the dime carefully. If the paddle never touches it, the clearance is too high. If it pushes the dime aggressively around the entire track, it is too low.
- Locate the adjustment screw nestled in the hinge mechanism when you tilt the head back. Turn it a quarter-inch counter-clockwise to lower the beater, or clockwise to raise it.
The goal is for the paddle to just barely kiss the dime, nudging it gently a fraction of an inch with each pass.
Fixing the gap in your mixer is about more than just avoiding a dirty spatula. This simple tactile modification practically doubles your effective mixing volume, because the machine no longer wastes energy spinning over dead space.
- Target Object: Standard US dime (approximately 1.35mm thickness).
- Primary Tool: Flathead screwdriver.
- Maintenance Schedule: Recalibrate every six months, or after an unusually heavy mixing session.
Restoring Your Kitchen’s Rhythm
It alters the entire rhythm of your baking process, bringing harmony back to your countertop.
When you trust your tools implicitly, you stop hovering over the bowl. You simply pour the raw ingredients and let the machine shoulder the burden entirely, stepping away to prep your pans or clean the workspace.
You reclaim those lost minutes and that lost peace of mind. The machine hums smoothly, the dough comes together in a singular, cohesive mass, and you find yourself fully present in the kitchen again, unburdened by mechanical flaws.
A mixer is only as powerful as its proximity to the bowl; master the clearance, and the motor will do the rest.
| Key Point | Detail | Added Value for the Reader |
|---|---|---|
| Optimal Clearance | 1.35mm (thickness of a dime) | Eliminates unmixed flour at the bottom of the bowl. |
| Adjustment Direction | Counter-clockwise lowers paddle | Prevents motor burnout from pushing through dense pockets. |
| Tool Selection | Flat paddle attachment | Provides the most accurate horizontal measurement surface. |
Frequently Asked Questions
Why use a dime instead of a penny? A dime is exactly 1.35mm thick, which matches the factory specification for optimal clearance. A penny is slightly too thick.
Will lowering the beater scratch my bowl? Not if adjusted correctly. The goal is for the beater to barely nudge the dime, meaning it hovers just above the actual metal bowl.
Does this work for bowl-lift mixers? Yes, bowl-lift models have a similar adjustment screw located on the neck of the machine, operating on the exact same mechanical principle.
Why does my mixer head bounce when kneading? The tilt-head pin might be loose, or your dough is too stiff. Recalibrating the height often reduces this bounce by improving ingredient engagement.
How often should I perform the dime test? Every six months is ideal, or immediately after mixing exceptionally heavy batches like bagels or stiff cookie dough.